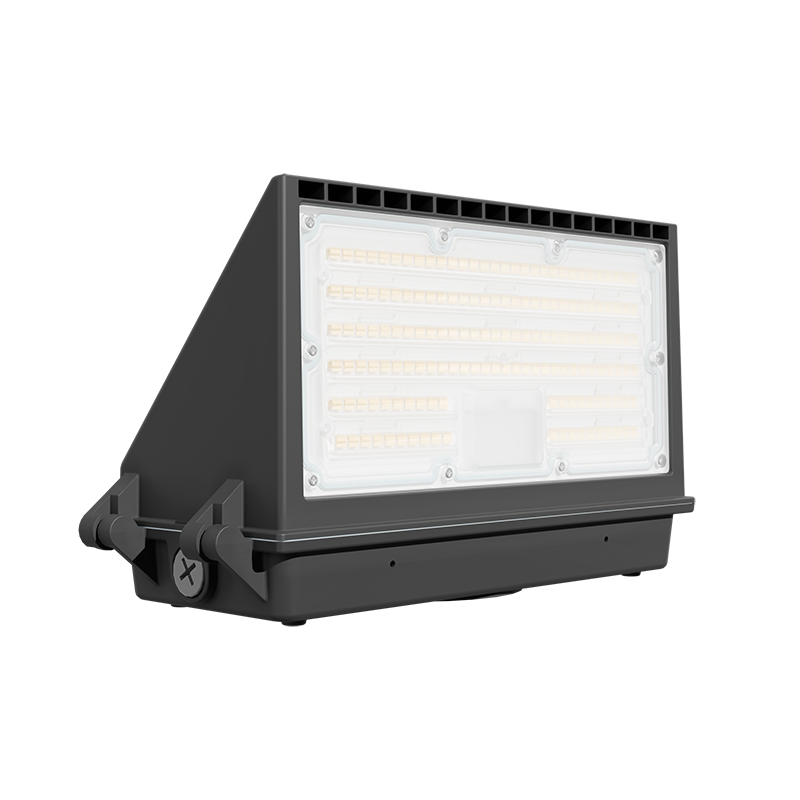


45W/60W/75W UL Listed LED Wall Pack Full Cutoff 4000K/5000K w/ Photocell (replaces 100W-250W MH)
Couldn't load pickup availability
Full Cutoff LED Wall Pack with PC Cover
Selectable Wattage: 45W / 60W / 75W · Selectable CCT: 3000K / 4000K / 5000K
PHOTOCELL BUILT IN
Overview
A die-cast aluminum full-cutoff wall pack with a wedge-profile housing and a diffused polycarbonate cover, designed for wet-location exterior mounting on buildings, loading docks, entryways, stairwells, walkways, and perimeter walls. A single SKU covers three power levels and three color temperatures, both set in the field with internal DIP switches — so one fixture on the truck handles multiple spec conditions and reduces the number of part numbers you have to stock. Rated for roughly 70% energy savings versus legacy HID wall packs, and backed by a 5-year warranty.
Field-Selectable Output
Two DIP switches inside the housing set wattage and color temperature after mounting, before the top half is closed up. Labels for both are printed inside the fixture for reference.
| Setting | Nominal Wattage | Approx. Delivered Lumens¹ |
|---|---|---|
| Low | 45W | ~5,400 lm |
| Mid | 60W | ~7,200 lm |
| High | 75W | ~9,000 lm |
CCT options: 3000K (warm) · 4000K (neutral) · 5000K (daylight)
¹ Calculated from the sheet's stated 120 lm/W luminaire efficacy ("H" = high-efficiency version). Torshare does not publish per-setting lumen values on this document — confirm with the factory if you need certified photometrics for a submittal.
Electrical
- Input voltage: AC 120–277V, 50/60 Hz (universal multi-volt)
- Input current @ 120V: 0.694A at the 75W setting (approx. 0.56A at 60W, 0.42A at 45W); proportionally lower on 208/240/277V
- Power factor: >0.9
- Driver: isolated, constant-current, 0-10V dimmable
- Dimming leads: purple (DIM+), pink (DIM-)
- Line leads: black (L), white (N), green (ground)
- LED leads: red (LED+), black (LED-)
- Lead length: 0.15 m factory whip
Optical Performance
- Beam angle: 90° × 100°
- Average beam angle (50%): 75.4°
- Intensity distribution (C-plane, 50% angles): C0/180 – 82.4° · C30/210 – 77.5° · C60/240 – 73.1° · C90/270 – 68.8°
- Peak intensity: approx. 2,500 cd (per the published polar plot)
- CRI: Ra > 70
- Distribution character: forward-throw, downward-biased pattern typical of a full-cutoff wall pack — light is pushed out and down across the wall face rather than up into the sky
Construction & Environmental
- Housing material: ADC12 die-cast aluminum with integral top fin array for passive thermal management
- Finish: brown
- Lens/cover: diffused polycarbonate (PC)
- Sealing: continuous silicone gasket ring — full dust exclusion and water ingress protection
- Location rating: Wet Location
- Built-in level: internal bubble/level reference ensures the fixture sits horizontal during mounting
- Operating temperature: -40°F to +104°F (-40°C to +40°C)
- Storage temperature: -40°F to +158°F (-40°C to +70°C)
- Rated life: ≥50,000 hours
- Mounting: bracket-fixed, mounts directly over a recessed/embedded junction box
Dimensions
| Metric | Imperial | |
|---|---|---|
| Width | 321.7 mm | 12.67 in |
| Height | 188.1 mm | 7.41 in |
| Depth (projection) | 129.6 mm | 5.10 in |
Installation Sequence
- Unscrew the fixture screws with a screwdriver and remove the upper half of the fixture.
- Unscrew and remove the cover over the entry hole on the lamp base.
- Using the embedded junction box as the template, punch the corresponding mounting holes in the light's mount.
- Route the supply conductors from the embedded box through the waterproof pad and into the lamp base.
- Screw the lamp base to the embedded junction box.
- Land the input wiring and the 0-10V dimming wiring, then tuck the connections back into the embedded box.
- Set the wattage and CCT on the two internal DIP switches per the printed labels.
- Reinstall the upper half of the fixture and secure with screws. Installation complete.
Safety Notes
- Operate only at AC 120–277V, 50/60 Hz — do not exceed.
- Kill power at the mains or the connection lead before any work.
- Maintain waterproofing, dust protection, and shock protection on all external wiring.
- Fix mounting bolts directly through the mounting bracket holes onto the installation stem.
- Verify all wire connections are sound before energizing; watch for leakage paths.
- Read the full specification before installation.
- Complete installation must be performed by a qualified electrician.